# 前言
首先说说,为什么在这种时候突然研究这个:因为,如同前面面试那章所说,“明明感觉有印象,就是说不出个所以然来了...”,寻路算法说实话,曾经我在看《游戏人工智能编程》那本书的时候,还是专门研究过一段时间的。面试的时候虽然问的 Navmesh,但是下来后我发现自己对 A * 的原理,也忘得差不多了... 项目不用,自己也不复习的话,时间会让它变成记忆里的渣渣的!
所以,这儿必须得复习一下了!之所以名字不叫 “A*”,是因为可能的话,我还是想先复习 A*,然后研究下 Navmesh 的具体算法。
另外,我想把这个做成一个工具 —— 至少以后可以随便移植使用的那种。
另外,在下的口才也不是很好,所以若有没说明白的地方...
PS: 该篇文章仅代表个人理解!
# A * 算法
# 简介
A * 算法实际上是在 “Dijkstra” 算法及的基础上,加入了一个 “启发值” 进行优化而来的。
Dijkstra 算法:这个算法会在初始点向周围 “辐射”,直到找到终点,其优点是一定能找到最短路径,缺点是搜索范围很大,找到终点的时候,基本上把起点到终点那一圈的距离都搜索了一遍了。
A*:在 Dijkstra 算法的基础上,加入了 “启发值”,通常为三种:
# 1. 起点到当前点的消耗;
“起点到当前点的消耗”,一般最简单的做法是根据事先决定的每个节点的消耗,将起点至当前点路径消耗相加(若有其他需求,也可能会为不同类型的节点加入不同的消耗值。例如,若为每个区域加入不同的消耗,那么通过一堆火焰的消耗肯定就会比通过一个安全的区域要大得多,但是若通过安全区域的消耗值已经大于通过火焰的消耗,寻路就会选择通过火焰)。
# 2. 当前点到终点的消耗;
一般来说,会使用 “曼哈顿距离” 或者 “欧几里得距离”,这个用于 “启发” 节点,使其总是会尽量寻找离终点最近的方向。
曼哈顿距离:计算两个节点的 X、Y 相减的绝对值相加 —— 画成三角形的话,就是两条直边的和。
欧几里德距离:直接就是两点距离 —— 表现为三角形的斜边长度。
# 3. 前两项之和。
为总的消耗,该值决定了一个节点是否成为 “最短路径节点”。
上述便是启发值的功能,可以看出来,启发值主要起到了一种 “提示”,当然也是最重要的一点功能。若第二项启发值为 0,那么就会退化成 Dijkstra 算法了。
# 效果
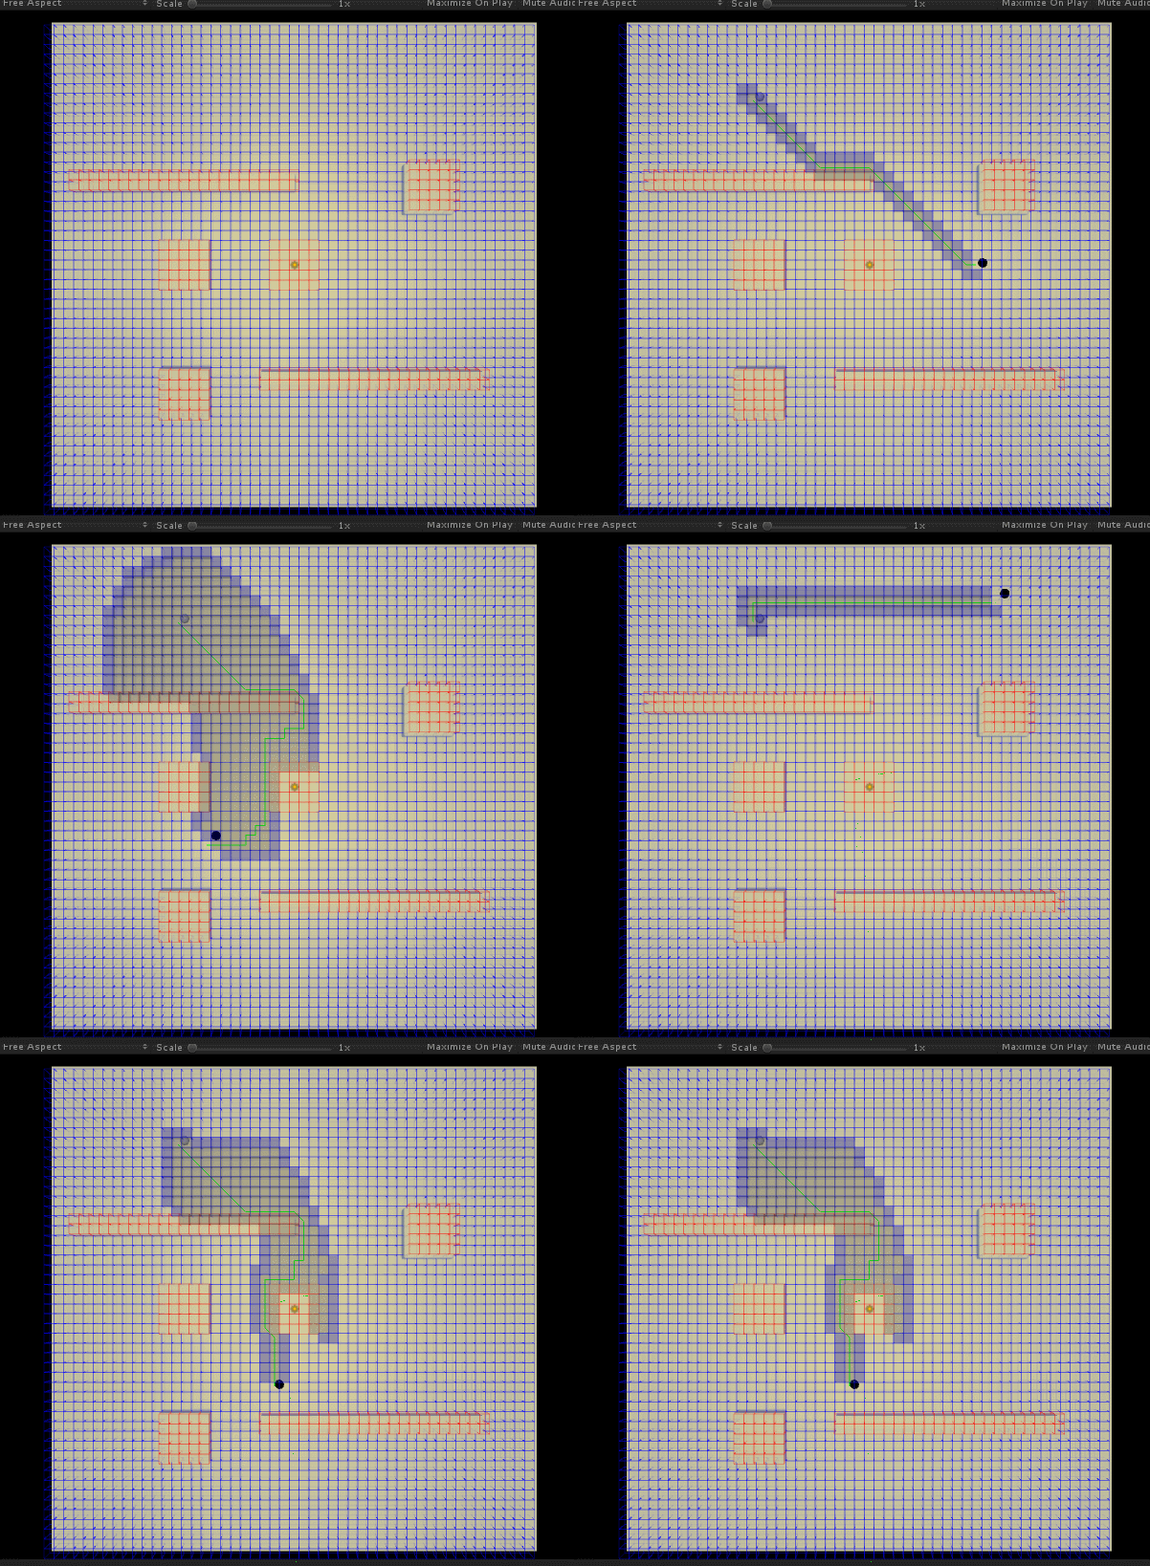
效果... 因为太长了,所以特意将其移到这上边来,不然都看不见了。
效果如下:


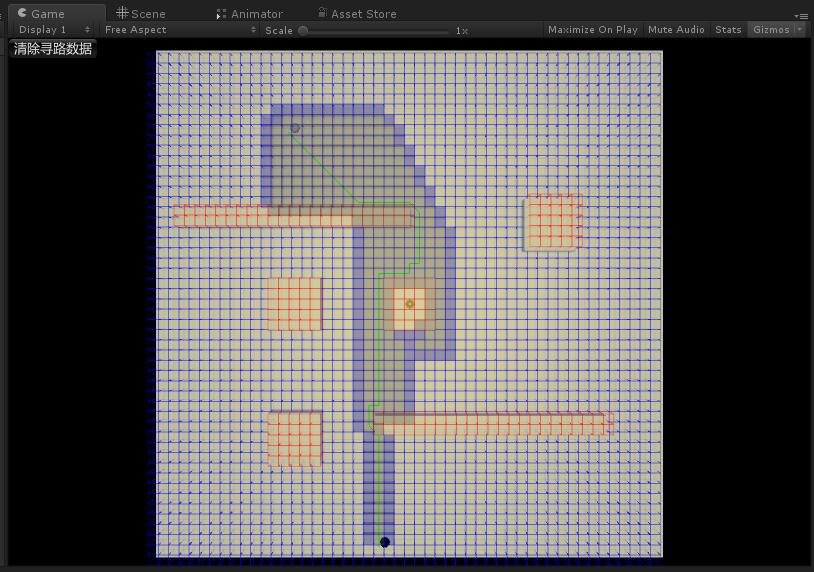
咋一看还行... 但是不知道是参数 (启发值) 还是实现问题,虽然确实总是能找到最近的一条路径,但是有时候 (比如通过障碍很多等) 在找这条路径的过程中,会寻找过多的无用节点 (计算出路径后,显示于图中灰色的格子)—— 明明看起来不应该的。
后面我会再仔细分析下的,目前就到这儿了。
源码也已经放在了 GitHub 上 (另外暂时还有写功能没实现,比如 SimpleAStar 的事先烘焙地图数据的保存,有空再弄吧)。
链接:GitHub
——————————————————————————————————
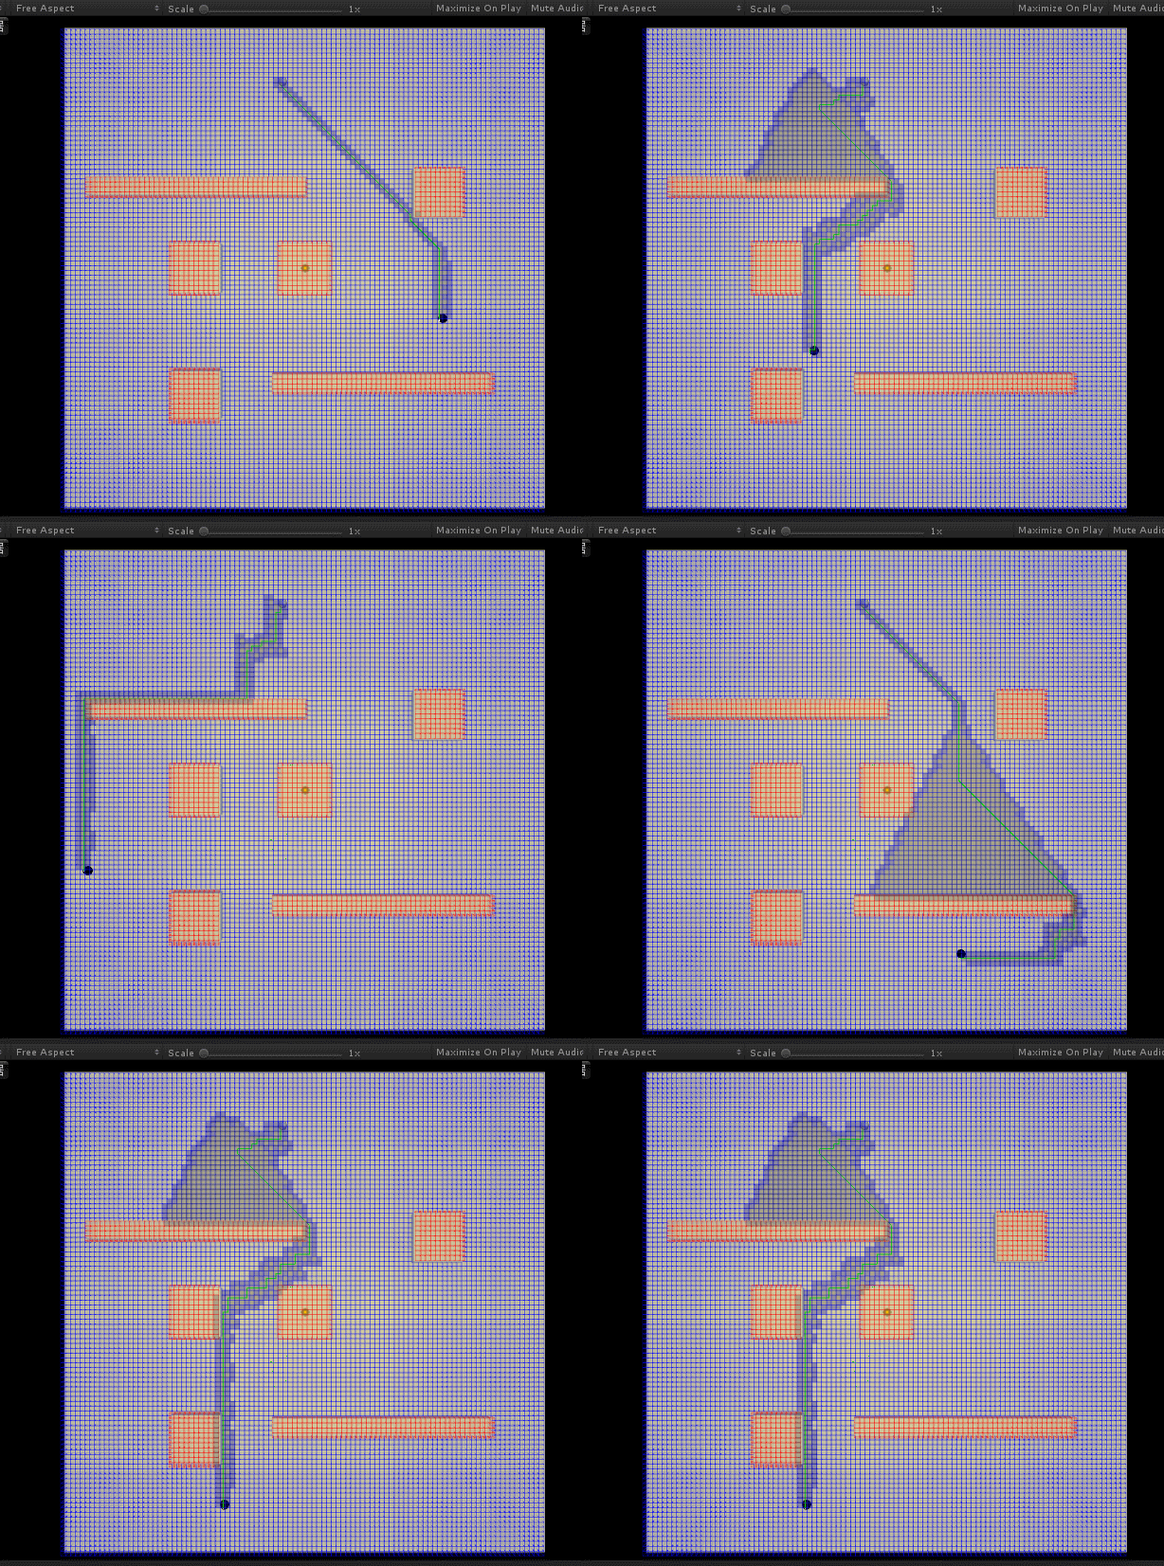
后面优化调整了一下 H 与 G 值的计算比例,并且将其与地图格子大小相匹配,效果与效率都好了不少:

# 原理
# 分析
然后,来简单说一下具体原理吧。
除了上述的启发值之外,A * 还会维护一个 “开放表” 和 “关闭表”,对于已经处理过的点,会放入关闭表中,并将点周围的点放入开放表中。
主要分为以下几步:
1. 将初始点放入开放表。
2. 开启一个循环判断:若开放表中存在节点,取出该节点。
3. 循环判断该节点周围的点,若该节点已经位于关闭表,跳过;
若该节点为终点,结束。
否则,计算消耗,并判断其是否位于开放表,若没有,将其放入开放表,否则判断其已存在于开放表中的消耗值,若消耗更小,更新消耗数据及父节点引用。然后将已计算周围节点的节点放入关闭表。
4. 进入第二步。
(大致算法就是这么个样子了,至于清不清楚,那就得等往后我将这个算法又 “再次” 忘得差不多了,然后再回头看到这几句话的时候才知道了。)
# 伪代码
然后,再简单地写一下伪代码吧:
初始点,终点 | |
开放表.Add(初始点); | |
do{ | |
当前节点=开放表[0]; | |
开放表.RemoveAt(0); | |
关闭表.Add(当前节点); | |
for(节点 in 当前节点的周围节点) | |
{ | |
if(节点在关闭表中) continue; | |
if(节点是终点) { | |
节点.父节点=当前节点; | |
return 回溯并组成路径列表(节点); | |
} | |
H=计算至终点消耗(节点,终点); | |
G=当前节点.G+节点消耗; | |
F=H+G; | |
if(节点在开放表中) | |
{ | |
if(G<节点.G) | |
{ | |
节点.H=G; | |
节点.G=G; | |
节点.F=F; | |
节点.父节点=当前节点; | |
} | |
}else{ | |
节点.H=G; | |
节点.G=G; | |
节点.F=F; | |
节点.父节点=当前节点; | |
开放表.Add(节点); | |
} | |
} | |
根据F值排序开放列表(); | |
}while(开放表.Length>0); |
# 实现
OK,伪码差不多这样了,接下来就是具体的实现了。
# Node 类
第一步,为了方便存储节点的数据,一般来说,都要封装一个节点类。
在这儿,我首先创建了一个 “NodeBase”:
namespace SimpleAStar | |
{ | |
/// <summary> | |
/// ******************************************* | |
/// Powered By Wangjiaying | |
/// Date: 2017.2.17 | |
/// Func : | |
/// ******************************************* | |
/// </summary> | |
[System.Serializable] | |
public class NodeBase | |
{ | |
protected float _x; | |
protected float _y; | |
protected float _z; | |
public float X { get { return _x; } } | |
public float Y { get { return _y; } set { _y = value; } } | |
public float Z { get { return _z; } } | |
public NodeBase(float x, float y, float z) | |
{ | |
_x = x; | |
_y = y; | |
_z = z; | |
} | |
} | |
} |
这个类存放了节点的 X、Y、Z 三个值,即具体坐标。
接下来是 Node,继承于 NodeBase;Node 类中,保存了节点的 G、H、F 值以及其对于父节点的引用 —— 这是为了最后 Build 路径而存在了,多数都是如此。同时还加了一个是否是障碍物的标识:
private Node _parentNode; | |
private bool _obstacle = false; | |
private int _G; | |
private int _H; | |
private int _F; |
然后,为了方便从地图数据中取出相应节点,还将其在地图数据的索引也存储了一下:
// 用于方便从地图数据中取出的索引 | |
private int _indexX; | |
private int _indexY; |
最后,为了方便地实现上述伪码中,根据节点的 F 值进行排序(以便每次都能从中取出最小的 F 值节点),还实现了系统的 “IComparable” 接口:
int IComparable<Node>.CompareTo(Node other) | |
{ | |
return F - other.F; | |
} |
Node 类最终代码如下:
using System; | |
using System.Collections; | |
using System.Collections.Generic; | |
using UnityEngine; | |
namespace SimpleAStar | |
{ | |
/// <summary> | |
/// ******************************************* | |
/// Powered By Wangjiaying | |
/// Date: 2017.2.17 | |
/// Func : | |
/// ******************************************* | |
/// </summary> | |
[System.Serializable] | |
public class Node : NodeBase, IComparable<Node> | |
{ | |
private Node _parentNode; | |
private bool _obstacle = false; | |
private int _G; | |
private int _H; | |
private int _F; | |
public int G { get { return _G; } set { _G = value; } } | |
public int H { get { return _H; } set { _H = value; } } | |
public int F { get { return _F; } } | |
// 用于方便从地图数据中取出的索引 | |
private int _indexX; | |
private int _indexY; | |
public int IndexX { get { return _indexX; } } | |
public int IndexY { get { return _indexY; } } | |
public bool IsObstacle { get { return _obstacle; } set { _obstacle = value; } } | |
public Node(float x, float y, float z) : base(x, y, z) { } | |
public Node ParentNode { set { _parentNode = value; } } | |
public Vector3 Position { get { return new Vector3(X, Y, Z); } } | |
public void SetIndex(int x, int y) | |
{ | |
_indexX = x; | |
_indexY = y; | |
} | |
public void RecalcF() | |
{ | |
_F = _G + _H; | |
} | |
public void BuildPath(List<Vector3> path) | |
{ | |
path.Add(Position); | |
if (_parentNode != null) | |
_parentNode.BuildPath(path); | |
} | |
int IComparable<Node>.CompareTo(Node other) | |
{ | |
return F - other.F; | |
} | |
} | |
} |
# SimpleAStar
SimpleAStar, 这个类继承于 MonoBehaviour, 主要用于场景中烘焙及保存地图数据的功能。
初始状态下,在 Awake 中将自己注册至 “SimpleAStarManager” 中 (SimpleAStarManager 稍后再将,主要起一个管理作用,具体进行 A * 计算也是在那边),然后... 然后就没了,功能暂时来说,还是比较简单的。
using UnityEngine; | |
namespace SimpleAStar | |
{ | |
/// <summary> | |
/// ******************************************* | |
/// Powered By Wangjiaying | |
/// Date: 2017.2.17 | |
/// Func : | |
/// ******************************************* | |
/// </summary> | |
public class SimpleAStar : MonoBehaviour | |
{ | |
// 代表该 A * 的区域长和宽 | |
[SerializeField] | |
private int _gridX = 50; | |
[SerializeField] | |
private int _gridY = 50; | |
[SerializeField] | |
// 格子的大小 | |
private float _gridSize = 1f; | |
public float GridSize { get { return _gridSize; } } | |
[SerializeField] | |
[HideInInspector] | |
private Node[,] _nodeList; | |
private void Awake() | |
{ | |
SimpleAStarManager.GetInstance.Register(this); | |
// 测试代码 | |
// 因为还没做保存功能,所以开始时刷新一下 | |
Scan(); | |
} | |
/// <summary> | |
/// 扫描 (可以理解为烘焙一次寻路数据) | |
/// </summary> | |
public void Scan() | |
{ | |
// 初始化数组 | |
_nodeList = new Node[_gridX, _gridY]; | |
// 起点,为当前物体的位置 | |
float x = transform.position.x; | |
float y = transform.position.y; | |
float z = transform.position.z; | |
for (int i = 0; i < _gridX; i++) | |
{ | |
for (int j = 0; j < _gridY; j++) | |
{ | |
Node node = Tools.CreateNode(new Vector3(x + i * _gridSize, y, z + j * _gridSize)); | |
node.SetIndex(i, j); | |
_nodeList[i, j] = node; | |
} | |
} | |
} | |
/// <summary> | |
/// 获取 A * 地图数据 | |
/// </summary> | |
public Node[,] MapData | |
{ | |
get { return _nodeList; } | |
} | |
// 这儿只是为了显示 Gizmos,所以可以不用在意 | |
// 不看都可以 | |
#if UNITY_EDITOR | |
private void OnDrawGizmos() | |
{ | |
if (_nodeList == null) return; | |
Color normal = new Color(0, 0, 1, 0.3f); | |
Color obstacle = new Color(1, 0, 0, 0.3f); | |
for (int i = 0; i < _nodeList.GetLength(0); i++) | |
{ | |
for (int j = 0; j < _nodeList.GetLength(1); j++) | |
{ | |
Node node = _nodeList[i, j]; | |
Gizmos.color = node.IsObstacle ? obstacle : normal; | |
Gizmos.DrawWireCube(node.Position, Vector3.one * _gridSize); | |
} | |
} | |
Gizmos.color = new Color(0, 0, 1, 0.3f); | |
foreach (var node in SimpleAStarManager.GetInstance.OpenList) | |
{ | |
Gizmos.DrawCube(node.Position, Vector3.one * _gridSize); | |
} | |
Gizmos.color = new Color(0.5f, 0.5f, 0.5f, 0.3f); | |
foreach (var node in SimpleAStarManager.GetInstance.CloseList) | |
{ | |
Gizmos.DrawCube(node.Position, Vector3.one * _gridSize); | |
} | |
} | |
#endif | |
} | |
} |
主要注意一下 Scan 方法中,对 Tools 的调用。
# Tools
该类封装了一些工具方法,目前就只有一个,即上面引用过的创建节点的方法:
/// <summary> | |
/// 通过一个坐标点生成一个 Node | |
/// 会通过 Raycast 检查节点是否可一通行 | |
/// </summary> | |
/// <param name="pos"></param> | |
/// <returns></returns> | |
public static Node CreateNode(Vector3 pos) | |
{ | |
Node node = new Node(pos.x, pos.y, pos.z); | |
RaycastHit hit; | |
if (Physics.Raycast(pos + Vector3.up * 100, Vector3.down, out hit, 120)) | |
{ | |
node.Y = hit.point.y; | |
// 通过 Tag 来判断是否属于障碍物 | |
if (hit.transform.CompareTag("Obstacle")) | |
node.IsObstacle = true; | |
} | |
return node; | |
} |
该方法通过射线检测碰撞及障碍物,所以注意使用时,必须将障碍物的 Tag 设置为 “Obstacle” 才行啊。
# SimpleAStarManager
然后是 SimpleAStarManager。
这个类应该算是最主要和重要的一个类了。
上述伪代码也就主要在此实现。
using System.Collections.Generic; | |
using UnityEngine; | |
namespace SimpleAStar | |
{ | |
/// <summary> | |
/// ******************************************* | |
/// Powered By Wangjiaying | |
/// Date: 2017.2.17 | |
/// Func : | |
/// ******************************************* | |
/// </summary> | |
public class SimpleAStarManager | |
{ | |
private static SimpleAStarManager _instance; | |
public static SimpleAStarManager GetInstance | |
{ | |
get | |
{ | |
if (_instance == null) _instance = new SimpleAStarManager(); | |
return _instance; | |
} | |
} | |
// 暂时,假设一个场景只会有一个寻路数据 | |
private SimpleAStar _aStar; | |
public void Register(SimpleAStar aStar) | |
{ | |
_aStar = aStar; | |
} | |
private Node _startNode; | |
private Node _endNode; | |
private List<Node> _openList = new List<Node>(); | |
private List<Node> _closeList = new List<Node>(); | |
private List<Vector3> _pathList = new List<Vector3>(); | |
#if UNITY_EDITOR | |
public List<Node> OpenList { get { return _openList; } } | |
public List<Node> CloseList { get { return _closeList; } } | |
#endif | |
/// <summary> | |
/// 计算一条从指定点到指定点的路径 | |
/// </summary> | |
/// <param name="start"></param> | |
/// <param name="end"></param> | |
public void CalcPath(Vector3 start, Vector3 end, System.Action<Vector3[]> callBack) | |
{ | |
//Debug.Log("Reuest"); | |
// 计算起点位于数据图中的坐标 | |
_startNode = GetNode(start, _aStar); | |
// 计算终点位于数据图中的坐标 | |
_endNode = GetNode(end, _aStar); | |
//System.Threading.Thread thread = new System.Threading.Thread(new System.Threading.ParameterizedThreadStart(CalcPathThread)); | |
//thread.Start(callBack); | |
CalcPathThread(callBack); | |
} | |
private void CalcPathThread(object callback) | |
{ | |
//Debug.Log("Thread"); | |
//lock (this) | |
{ | |
_pathList.Clear(); | |
_openList.Clear(); | |
_closeList.Clear(); | |
// 将其父级及消耗置为空,避免多次使用可能出现的问题 | |
_startNode.ParentNode = null; | |
_startNode.G = 0; | |
_startNode.H = 0; | |
_openList.Add(_startNode); | |
do | |
{ | |
Node currentNode = _openList[0]; | |
_openList.RemoveAt(0); | |
_closeList.Add(currentNode); | |
// 计算邻边 | |
for (int i = -1; i < 2; i++) | |
{ | |
for (int j = -1; j < 2; j++) | |
{ | |
// 目前的话,我们仅考虑四个方向 | |
// 为了简单嘛 | |
if (i == j) continue; | |
Node node = GetNode(currentNode.IndexX + i, currentNode.IndexY + j); | |
if (node != null) | |
{ | |
// 若节点就是结束点,那么... | |
if (node == _endNode) | |
{ | |
node.ParentNode = currentNode; | |
node.BuildPath(_pathList); | |
if (callback != null) | |
{ | |
Vector3[] path = _pathList.ToArray(); | |
// 最后将路径反向 | |
System.Array.Reverse(path); | |
(callback as System.Action<Vector3[]>).Invoke(path); | |
} | |
return; | |
} | |
// 已经位于关闭表,跳过 | |
if (_closeList.Contains(node)) continue; | |
// 若节点是障碍物,直接放入关闭列表 | |
if (node.IsObstacle) | |
{ | |
_closeList.Add(node); | |
continue; | |
} | |
// 计算开始到当前节点消耗 | |
int G = CalcG(currentNode); | |
// 当前点至终点消耗 | |
int H = CalcH(node, _endNode); | |
// 开启表中存在节点 | |
if (_openList.Contains(node)) | |
{ | |
// 判断新的路径消耗 | |
if (G < node.G) | |
{ | |
node.G = G; | |
node.H = H; | |
node.ParentNode = currentNode; | |
node.RecalcF(); | |
} | |
} | |
else | |
{ | |
// 开启列表不存在节点 | |
node.G = G; | |
node.H = H; | |
node.ParentNode = currentNode; | |
node.RecalcF(); | |
// 添加至开启列表 | |
_openList.Add(node); | |
} | |
} | |
} | |
} | |
// 重新排序 | |
_openList.Sort(); | |
//Debug.Log(_openList.Count); | |
} while (_openList.Count > 0); | |
//Debug.Log("Thread End"); | |
} | |
} | |
/// <summary> | |
/// 通过索引获取 Node,将会判断是否合法 | |
/// </summary> | |
/// <param name="indexX"></param> | |
/// <param name="indexY"></param> | |
/// <returns></returns> | |
private Node GetNode(int indexX, int indexY) | |
{ | |
if (indexX >= _aStar.MapData.GetLength(0) || indexY >= _aStar.MapData.GetLength(1) || indexX < 0 || indexY < 0) return null; | |
//Debug.Log(indexX + " " + indexY); | |
return _aStar.MapData[indexX, indexY]; | |
} | |
private static int CalcG(Node node) | |
{ | |
return node.G + 1; | |
} | |
private static int CalcH(Node node, Node endNode) | |
{ | |
// 使用曼哈顿距离进行 Hint | |
return (int)(Mathf.Abs(endNode.X - node.X) + Mathf.Abs(endNode.Z - node.Z)); | |
//return (int)Vector3.Distance(endNode.Position, node.Position); | |
} | |
private static Node GetNode(Vector3 pos, SimpleAStar aStar) | |
{ | |
Vector3 originPos = aStar.transform.position; | |
int x = (int)((pos.x - originPos.x) / aStar.GridSize); | |
int y = (int)((pos.z - originPos.z) / aStar.GridSize); | |
// 返回计算出的点 | |
return aStar.MapData[x, y]; | |
} | |
} | |
} |
# 测试脚本 SimpleAStarTest
最后,写了一个 SimpleAStarTest 的测试脚本,用于测试算法的实际功能。
using UnityEngine; | |
namespace SimpleAStar | |
{ | |
/// <summary> | |
/// ******************************************* | |
/// Powered By Wangjiaying | |
/// Date: 2017.2.17 | |
/// Func : | |
/// ******************************************* | |
/// </summary> | |
public class SimpleAStarTest : MonoBehaviour | |
{ | |
private Vector3 _startPos; | |
private Vector3 _endPos; | |
private Vector3[] _path; | |
private void Update() | |
{ | |
if (Input.GetMouseButtonDown(0)) | |
{ | |
Ray ray = Camera.main.ScreenPointToRay(Input.mousePosition); | |
RaycastHit hit; | |
if (Physics.Raycast(ray, out hit, 100)) | |
{ | |
if (_startPos == Vector3.zero) | |
{ | |
_startPos = hit.point; | |
return; | |
} | |
_endPos = hit.point; | |
SimpleAStarManager.GetInstance.CalcPath(_startPos, _endPos, (path) => _path = path); | |
} | |
} | |
} | |
public void OnGUI() | |
{ | |
if (GUILayout.Button("清除寻路数据")) | |
{ | |
_startPos = Vector3.zero; | |
_endPos = Vector3.zero; | |
_path = null; | |
} | |
} | |
private void OnDrawGizmos() | |
{ | |
Gizmos.color = new Color(1, 1, 1, 1f); | |
if (_startPos != Vector3.zero) | |
Gizmos.DrawSphere(_startPos, 0.5f); | |
Gizmos.color = new Color(0, 0, 0, 1f); | |
if (_endPos != Vector3.zero) | |
Gizmos.DrawSphere(_endPos, 0.5f); | |
Gizmos.color = Color.green; | |
if (_path != null) | |
for (int i = 0; i < _path.Length - 1; i++) | |
{ | |
Gizmos.DrawLine(_path[i], _path[i + 1]); | |
} | |
} | |
} | |
} |
